Daypack Essentials: The Complete Day Hike Checklist for Beginners
# Daypack Essentials: The Complete Day Hike Checklist for Beginners
You spend Monday through Friday at a desk, and now Saturday morning is finally here. The trailhead is calling, your boots are by the door, and all that stands between you and a great day outside is one question: what actually goes in the pack?
Packing for a day hike looks simple until you are staring at an empty backpack at 7 a.m. with the car keys in your hand. Bring too little and a surprise rainstorm or a wrong turn turns your fun outing into a miserable slog. Bring too much and you spend the whole day hauling a bag that feels like it is filled with bricks.
This guide fixes both problems. It covers choosing the right size daypack, packing it so the weight disappears, and the full checklist of what to bring, organized by category. Everything is written for beginners, with budget-friendly options and zero jargon. Screenshot it or keep it open on your phone the night before your hike.
What Is a Daypack, and How Big Should Yours Be?
A daypack is a small backpack built for a single day on the trail. No sleeping bag, no tent, no stove. Just the food, water, layers, and safety gear you need between the parking lot and your return.
Capacity is measured in liters, and the sweet spot is smaller than most beginners expect. Outdoor retailer REI suggests a 10- to 20-liter pack for a longer day outing, and most dedicated daypacks top out around 32 liters, roughly half the size of a multi-day backpacking pack. Here is a practical breakdown:
| Your typical hike | Suggested capacity | Why it fits |
|---|---|---|
| Short local walk or nature loop, 1 to 2 hours | 10 to 15 liters | Holds water, snacks, a light layer, and your phone without tempting you to overpack |
| Typical weekend day hike, 3 to 6 hours | 15 to 25 liters | Room for lunch, extra water, a rain shell, and a basic first aid kit |
| Long full-day hike or cold-weather outing | 25 to 35 liters | Space for serious layers, extra food, and winter extras |
If you are buying your first pack, the 20-liter range is the safest bet. It covers the vast majority of day hikes without encouraging you to fill dead space with gear you will never touch.
What to look for in a daypack
Liters matter less than fit and features. When you shop, prioritize these:
- A hip belt that sits on your hips. This transfers weight off your shoulders and is the single biggest comfort upgrade on any pack.
- The right torso size. Packs come in sizes like people do. Try it loaded in the store.
- Hip belt pockets for small things you grab constantly: lip balm, a snack, your phone.
- A hydration sleeve or side water-bottle pockets. Either works. Side pockets suit beginners who prefer bottles.
- Some water protection. A built-in rain cover is nice, but water-resistant fabric plus a cheap pack liner works just as well.
Budget tip: borrow a pack from a friend for your first hike if you can, then buy once you know what size you actually use.
How to Pack a Daypack So It Feels Lighter
Two identical piles of gear can feel completely different depending on packing order. Weight carried high and close to your back feels lighter and more stable than the same weight slung low and loose. Packing order is free comfort.
Start the way experienced hikers do: gather everything on a flat surface first, like your bed or dining table, before a single item goes in the bag. Laying it all out keeps you from forgetting things and makes duplicates obvious. Then load in four zones:
Zone 1: The bottom. Light, bulky items you will not need until you stop. Your extra insulating layer and rain shell form a soft base here.
Zone 2: The middle, against your back. This is the heavy core. Water reservoir or full bottles, lunch, and the densest items go here, as close to your spine as possible. This keeps the pack from pulling you backward.
Zone 3: The top. Things you grab during the day: snacks, sunscreen, your map, the first aid kit, and a mid-layer you might add or shed. If weather looks threatening, the rain shell moves up here.
Zone 4: The pockets. The top lid pocket, hip belt pockets, and side pockets hold tiny essentials: phone, headlamp, lip balm, tissues, whistle, and a few emergency calories.
If rain is in the forecast, line the inside of your pack with a large trash bag before loading. Most daypacks resist drizzle but soak through in a real downpour, and a liner costs almost nothing.
When you are done, put the pack on, tighten the hip belt over your hip bones, then snug the shoulder straps. The weight should sit mostly on your hips. Walk around the house for a few minutes. If something pokes you now, it will torment you at mile four.
The Complete Day Hike Checklist
This is the heart of the guide: every category that belongs in a daypack. It is built on the classic Ten Essentials framework developed by The Mountaineers and still recommended by REI for every backcountry outing, including day hikes.
Water and hydration
Water is the heaviest thing you will carry and the most important. For a typical half-day hike, 2 to 3 liters is a solid starting point. As a planning guideline, REI notes that most people need about a half liter per hour during moderate activity in moderate temperatures, with more needed in heat, at altitude, or on strenuous climbs.
Carry bottles, a hydration reservoir, or both. Reservoirs make it easy to sip steadily, which helps beginners actually drink enough. Add electrolyte mix on hot days or if you sweat heavily. For longer hikes near streams, bring a small treatment method (filter, drops, or tablets) so you can refill instead of carrying everything from the trailhead. Start every hike with full containers.
Food and snacks
Pack lunch plus extra food beyond what you expect to eat. That "extra" is one of the Ten Essentials, and it is the difference between a minor delay and a miserable energy crash.
- Lunch: a sandwich, wrap, or grain bowl in a sturdy container
- Salty snacks: trail mix, pretzels, nuts
- Quick energy: granola bars, dried fruit, or energy chews
- One emergency snack you do not plan to eat, tucked in a pocket until you need it
- A small trash bag. Everything you bring in comes back out with you.
Choose foods that do not need cooking and will not melt into a mess.
Sun protection
Sunburn is the most common and most preventable hiking injury, and UV exposure is stronger at elevation. Pack sunglasses with real UV protection, a brimmed hat, and SPF lip balm. For sunscreen, health experts advise SPF 15 at minimum, with SPF 30 recommended for extended outdoor activity, in a broad-spectrum formula blocking both UVA and UVB rays. Reapply as often as every two hours, more often if you are sweating. Apply before you leave the trailhead, not at the first viewpoint.
Extra clothing: the layering system
Weather changes, you get sweaty on climbs and chilled on ridgelines, and extra clothes are one of the Ten Essentials for a reason. Think in layers:
- Base layer: a moisture-wicking shirt. Skip cotton. Cotton holds sweat against your skin and dries slowly, which is how beginners end up shivering on a breezy summit. Synthetics or merino wool are the standard picks.
- Mid layer: a fleece or lightweight insulated jacket
- Outer layer: a rain shell or windbreaker, even when the forecast looks perfect
- Extra socks. A dry pair at lunch is one of the cheapest morale boosts in hiking.
- Warm hat and light gloves in spring, fall, or at elevation
Pack what you would need to stay reasonably comfortable if you had to sit still in the elements for a few hours. That is the scenario extra clothing is really for.
Navigation
Getting lost is the top reason day hikers end up needing rescue, and it happens on "easy" trails more than remote ones. A wrong turn at an unmarked junction is all it takes.
- Your route downloaded for offline use, with your phone fully charged
- A paper map as backup. Phones die, screens crack, and cold drains batteries.
- A simple baseplate compass, plus ten minutes of practice at home learning to use it
- A trip plan left with someone: where you are going, your route, and when you expect to be back
Light
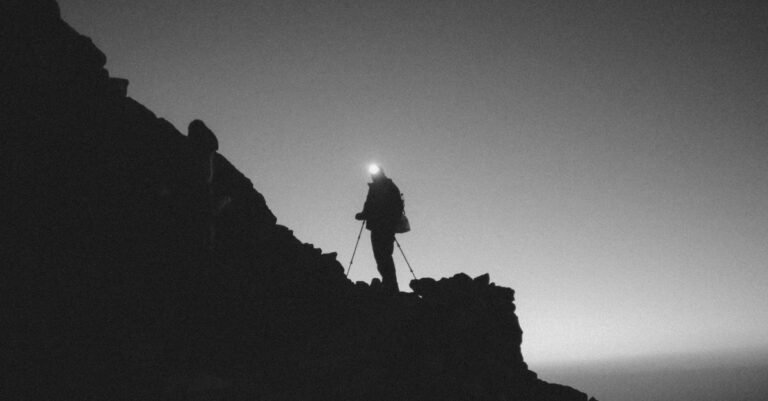
Even if you plan to be back by lunch, pack a headlamp. Hikes run long: a wrong turn, a twisted ankle, or a sunset you could not resist can push you past daylight. Headlamps beat flashlights because they keep your hands free. Bring spare batteries, and do not count your phone flashlight as your primary light. It drains the same battery your navigation depends on.
First aid kit
You need to handle blisters, small cuts, and minor mishaps, not run a field hospital. A good basic kit includes blister treatment (moleskin or blister pads), adhesive bandages in several sizes, gauze pads, adhesive tape, antiseptic wipes, over-the-counter pain reliever, tweezers, nitrile gloves, any personal medications, and a pen with a small notepad. Pre-assembled kits from outdoor brands are fine. Open yours at home once so you know what is inside before you need it on the trail.
Emergency gear: fire, shelter, and repair
This category feels dramatic until the day it is not. Each item is tiny, light, and cheap.
- Whistle. Three blasts is the universal distress signal, and a whistle carries far farther than shouting.
- Fire: a small lighter plus waterproof matches and a bit of firestarter (dryer lint in a zip bag works). Check local fire regulations first. In many areas, open fires are restricted or banned.
- Emergency shelter: an emergency blanket or lightweight bivy sack. It weighs almost nothing and protects you from wind and rain if you are stuck out unexpectedly.
- Knife or multitool for gear repair, food prep, and first aid tasks
- Small repair kit: a strip of duct tape wrapped around a pencil, a few feet of cord, and a safety pin or two
Hygiene and Leave No Trace
Bring toilet paper in a zip bag plus hand sanitizer. In some popular areas you must pack out all waste, so check local rules before you go. The short version of Leave No Trace for day hikers: pack out everything, stay on the trail, and leave rocks, plants, and wildlife as you found them.
Comfort extras
None of these are essential, but each earns its place on many hikers' lists. Trekking poles steady you on descents and take pressure off your knees. A foam sit pad makes lunch stops on cold or wet ground far nicer. Skip comfort items on your first few hikes and add them once the essentials feel automatic.
Pack by Scenario: Three Ready-Made Loadouts
| Short local loop, good weather (1-2 hrs) | Full-day mountain hike (5-8 hrs) | Cold or rainy day | |
|---|---|---|---|
| Water | 1 to 1.5 liters | 2.5 to 3+ liters | 2 liters plus a warm drink in a thermos |
| Food | Snacks only | Lunch plus extra snacks | Lunch plus extra snacks |
| Clothing | Light layer | Full layering system | Insulated jacket, rain pants, warm hat and gloves |
| Navigation | Phone with offline map | Phone, paper map, compass | Same, plus check seasonal closures |
| Safety | Whistle, headlamp, basic first aid | Full first aid, fire kit, emergency shelter, repair kit | Full kit plus dry bag for electronics |
The short-loop column is the minimum, not the goal. As hikes get longer, higher, remoter, or colder, scale up toward the full checklist.
Seasonal Tweaks
Spring: Trails are muddy and streams run high. A dry pair of socks in a zip bag is non-negotiable, and weather swings fast, so keep the rain shell handy.
Summer: Heat is the main adversary. Carry more water than you think you need, start early to dodge afternoon heat and thunderstorms, and take sun protection seriously.
Fall: Shorter days make the headlamp critical, and temperature swings between the parking lot and the summit can be dramatic. Pack the warm layers even when the morning feels mild.
Winter: Add insulated layers, traction devices for icy trails, and a thermos with a warm drink. Days are short and margins are thin, so beginners should stick to popular, well-traveled trails.
5 Beginner Overpacking Mistakes
1. Packing for every imaginable scenario. Three jackets, two books, and a full-size towel will ruin your day. Trust the checklist. If it is not on the list, you almost certainly do not need it.
2. Bringing full-size everything. You need a strip of duct tape, not the whole roll. Decant sunscreen into a small container and leave the giant multitool at home.
3. Wearing cotton. A cotton T-shirt feels fine at the trailhead and becomes a cold, soggy liability once you start sweating. Build your clothing around synthetics or wool.
4. Getting water wrong in either direction. A single small bottle for a six-hour hike is dangerous; five liters "to be safe" will wreck your shoulders. Use the half-liter-per-hour guideline and check the forecast.
5. Packing at 6:45 a.m. for a 7 a.m. departure. Rushed packing means forgotten essentials and random extras. Pack the night before, when you are calm and can think.
The Night-Before Packing Routine
Do this on Friday evening and Saturday starts smooth:
- Check the weather forecast and trail conditions, including alerts or closures.
- Lay out your hiking outfit plus packed layers.
- Gather every checklist item on a flat surface and check it off.
- Fill water containers and prep lunch and snacks.
- Charge your phone and headlamp.
- Load the pack using the four-zone method, heaviest items close to your back.
- Set out clothes, shoes, and socks so morning you can run on autopilot.
- Put your pack, shoes, and car keys by the door, and leave a trip plan with someone.
Ten focused minutes on Friday night beats thirty frantic minutes on Saturday morning.
Frequently Asked Questions
How much water should I bring on a day hike?
For a typical half-day hike in moderate weather, 2 to 3 liters is a solid starting point. A useful planning guideline from REI is about a half liter per hour of moderate activity in moderate temperatures, with more needed in heat, at altitude, or on strenuous climbs. When in doubt, carry a little extra.
Do I really need a map and compass if I have my phone?
Yes, as backup. Phones are excellent navigation tools with an offline map downloaded, but batteries die, screens break, and cold weather drains batteries fast. A paper map and a basic compass weigh almost nothing and work without a charge. At minimum, know your route's key junctions before you start.
How heavy should my daypack be?
There is no official rule, but a comfortable target for most beginners is under 10 to 15 pounds including water. If your pack feels heavy on your shoulders rather than your hips, adjust the fit first, then look for things to remove. Water and safety gear are the last things to cut.
Can I hike in cotton on a short, easy trail?
You can, but it is a bad habit. Cotton holds moisture and dries slowly, so even a short hike can leave you chilled if the wind picks up. Moisture-wicking synthetics and wool are affordable and widely available.
Do I need all of this for a short two-hour hike?
No. For a short, easy, well-marked loop in good weather, the minimum is water, snacks, sun protection, your phone with an offline map, and a charged headlamp. As hikes get longer, higher, remoter, or colder, add the layers, first aid, and emergency gear. Never skip telling someone your plan.
What should I leave in the car?
A complete change of clothes including shoes, plus extra water and a snack for the drive home. A small towel, a trash bag for dirty gear, and your parking pass or payment method round out the car kit.
Your Turn: Pack It, Then Forget About It
The goal of all this preparation is to stop thinking about your pack entirely. When everything you need is organized, fitted, and riding comfortably on your hips, your attention is free for the actual point of the day: the trail, the views, and a Saturday spent entirely on your own terms.
Start with the checklist and adjust it over a few hikes as you learn what you actually use. Within a month, packing your daypack will take ten minutes and feel as routine as packing your work bag, except the destination is much better.